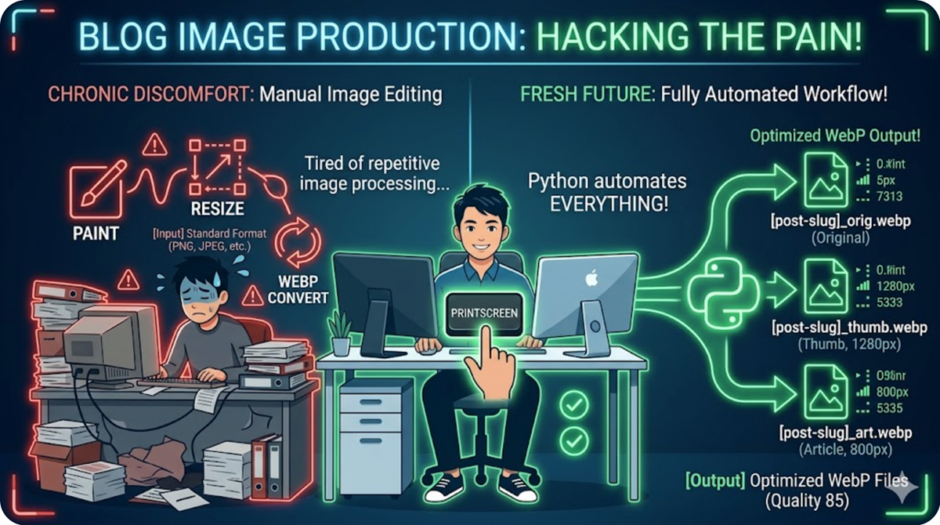

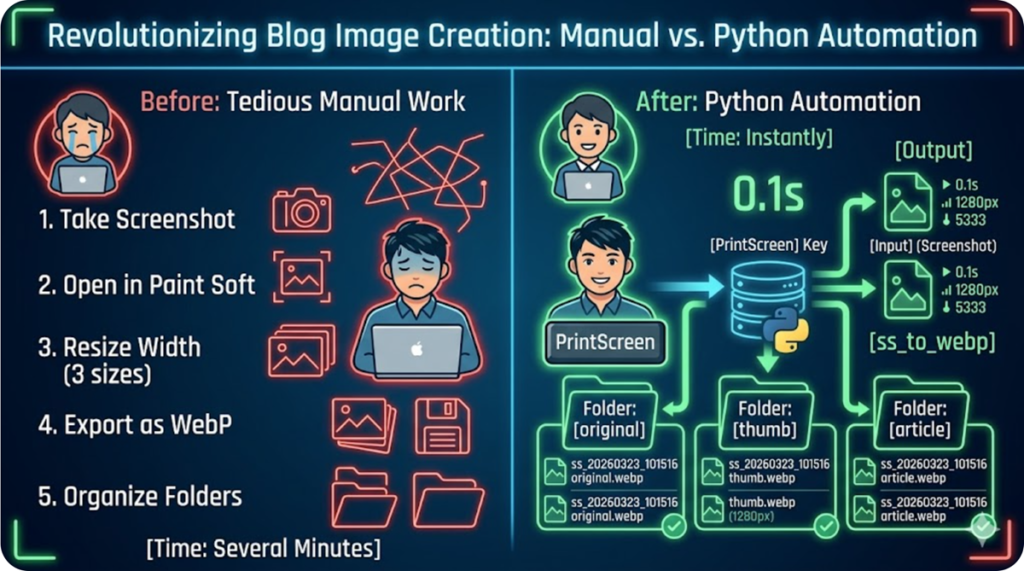
Quick Summary: Manual image resizing is a “hidden tax” on a developer’s creativity. This Python script silently watches your screenshot folder, instantly converts new files to WebP, and generates three optimized sizes (Original, Body, and Header)—all with Zero Clicks.
According to Google, WebP lossless images are 26% smaller in size compared to PNGs, and WebP lossy images are 25-34% smaller than comparable JPEG images at equivalent SSIM quality index. By automating this conversion, we significantly optimize web performance without sacrificing visual clarity.
🛠️ Why This Tool? (The Pain Point)
Prerequisites
To run this automation script, ensure you have the following environment and libraries installed:
| Component | Install Command / Link | Description |
| Python 3.x | python.org | Core interpreter (required) |
| Pillow (PIL) | pip install Pillow | Image processing & WebP conversion |
| pynput | pip install pynput | Global hotkey (Ctrl+S, etc.) detection |
Bash
pip install Pillow pynputWhen I was focused on affiliate marketing, image editing was a nightmare. Waiting for heavy software to boot just to resize a single screenshot felt like “creative death by a thousand cuts.”
I decided that a developer’s time should be spent on logic, not repetitive labor. This tool provides a Silent, Automatic, and Lightweight solution.
💻 Prerequisites
You’ll need the following libraries:
Bash
pip install Pillow watchdog
🐍 The Code: ss_to_webp.pyw
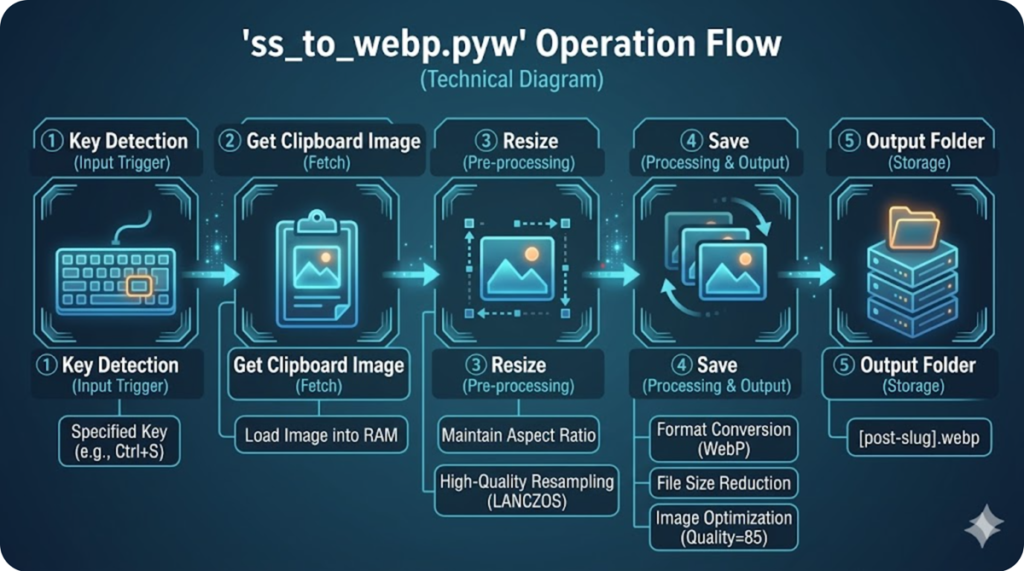
Save this with a .pyw extension to run it invisibly in the background.
Python
<details>
  <summary>🚀 Click here to see the Full Python Code (ss_to_webp.pyw)</summary>

  <pre><code>
"""
Silent WebP Transmuter v1.0
- Auto-converts Screenshots to WebP
- Generates 3 Optimized Sizes (Original, Body, Header)
- Runs Silently in Background (.pyw)
"""
import os
import time
from PIL import Image
from watchdog.observers import Observer
from watchdog.events import FileSystemEventHandler

# --- CONFIGURATION ---
SOURCE_DIR = r"C:\Your\Screenshot\Path" # Update this!
TARGET_DIR = os.path.join(SOURCE_DIR, "Transmuted_WebP")

SIZES = {
    "original": None,
    "body": 800,      # Optimized for blog post body
    "header": 1200    # Optimized for feature images
}

class ImageHandler(FileSystemEventHandler):
    def on_created(self, event):
        if event.is_directory or not event.src_path.lower().endswith(('.png', '.jpg', '.jpeg')):
            return

        # Avoid file-access conflicts
        time.sleep(1)
        self.process_image(event.src_path)

    def process_image(self, path):
        if not os.path.exists(TARGET_DIR):
            os.makedirs(TARGET_DIR)

        img = Image.open(path)
        timestamp = time.strftime("%Y%m%d_%H%M%S")

        for label, width in SIZES.items():
            out_img = img.copy()
            if width:
                # Aspect-ratio aware resizing
                w_percent = (width / float(out_img.size[0]))
                h_size = int((float(out_img.size[1]) * float(w_percent)))
                out_img = out_img.resize((width, h_size), Image.Resampling.LANCZOS)

            save_path = os.path.join(TARGET_DIR, f"ss_{timestamp}_{label}.webp")
            out_img.save(save_path, "WEBP", quality=85)
            print(f"Generated: {save_path}")

# --- MAIN EXECUTION ---
if __name__ == "__main__":
    event_handler = ImageHandler()
    observer = Observer()
    observer.schedule(event_handler, SOURCE_DIR, recursive=False)
    observer.start()
    try:
        while True:
            time.sleep(1)
    except KeyboardInterrupt:
        observer.stop()
    observer.join()
</code></pre>

</details>
✨ Key Features & “Developer Experience” (DX)
- Silent Operation: By using the
.pywextension, the tool runs in the background without annoying terminal windows. - Instant Gratification: The moment you hit “PrintScreen,” the optimized WebP files are already waiting in your folder.
- SEO Ready: WebP reduces image size by ~30% compared to PNG, directly boosting your site speed and AdSense revenue.
🌍 Global Summary: Reclaim Your Time
In this era of AI-assisted development, we shouldn’t be doing “grunt work.” This script isn’t just a utility; it’s a statement. Use it to automate the boring stuff so you can focus on building what matters.
Future Roadmap
This tool is just the beginning of my automation journey. I am currently planning the following features to enhance the “AI-Native” blogging experience:
- V-note Transmute Integration: A feature to clean up and digitize handwritten notes or diagrams captured by smartphones.
- Batch Conversion: A function to select multiple existing image files and convert them all to optimized WebP format at once.
- GUI version: A simple window interface to easily customize settings like output folders and image quality without touching the code.